Wooden Window Repairs Near Me Techniques To Simplify Your Daily Lifeth…
페이지 정보

본문
Wooden Window Repairs Near Me
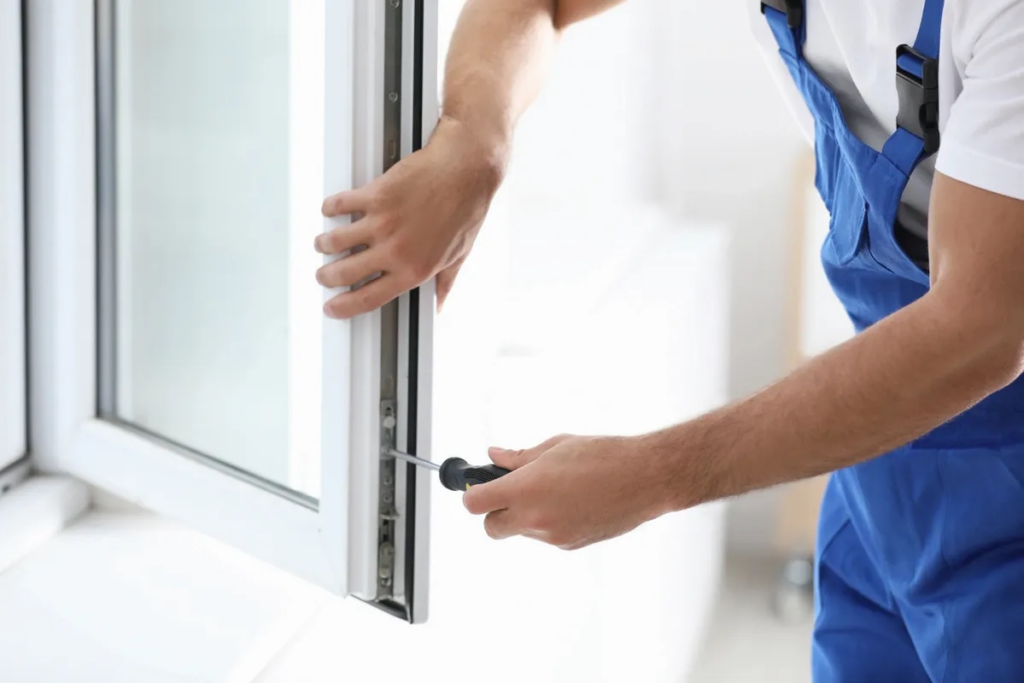
wooden windows repairs near me windows can be an attractive design element in a variety of homes. If properly maintained they are energy efficient and can add character.
They repair wooden window sashes, muntins and frames for sash windows that have been damaged due to weathering. They can tackle paint, rot consolidation and sill repair.
The restoration of wooden windows is vital to maintain the historical integrity of a house. If you have damaged windows that are old and worn out it is recommended to employ an professional.
Repairing a Rotten Wood Frame
It is a risk when the window repair service near me frames made of wood in a house begin to decay. If left untreated, rotting wood can be caused by a fungus that eats the material. In addition to making the area around your windows appear shabby, rotting wood can cause structural problems and can increase humidity in the house.
If the rotting is restricted to a tiny area, it may be possible to save the frame applying an adobe patch. Most often, this involves cutting off the damaged area and then putting in a new piece of timber with similar measurements. It is essential to select wood with a similar moisture content to the timber that was originally used in the frame. If you are unable to find the same type of timber with the exact moisture content, choose one that has the same density and grain pattern.
The next step in the process is mixing the epoxy before you apply it to the patched area. This is best done on a surface that the epoxy will not stick like a sheet of plexiglass. It's also essential to work carefully and take your time so you don't miss any spots. If you're not careful, a small hole could quickly turn into an extensive crack.
After the patch has dried and dried, you can sand the surface and paint it using exterior grade paint. You can also add colors to the patch if you wish.
The wood around windows, and especially the sill, is a frequent location for decay. It is essential to address the issue immediately if there is a problem. The rot can cause other issues with mold within your home.
If you've noticed lots of rot in the frames of your windows It's time to think about replacing them with vinyl windows. Vinyl windows offer many benefits such as improved indoor air quality and energy efficiency. They can also boost the value of your home's resales.
Repainting Wood Frames
If the glass, backing, and hanging hardware are in good condition painting an old frame can give it a fresh look without having to replace them. It can even be cheaper than purchasing a new frame. However, if the wood is in very poor condition, it could be necessary to replace it.
First, clean the frame thoroughly using a an aqueous cloth to get rid of dust and other debris. Then sand the surface to smooth it. If you're planning to reuse the frame apply an primer or undercoat to prepare the surface for paint. If you're not going to use the frame for another time, you can skip this step.
Apply a topcoat or sealant to the frame after it's dry. This will protect the frame's finish. Then you're ready to hang your work.
A stain for wood can be used to improve the color of a wooden frame. Staining preserves the original color but adds a bit of vibrancy and depth. It also helps hide nicks and chips. If you decide to paint your frame, you can use superfine grit and sand the frame again before applying stain.
 If you're using spray paint, Porch Daydreamer suggests covering your work area with newspapers or a drop cloth. If you are able remove the glass and art from the frame to prevent drips and splatters. If not, tape the edges of the glass with painter's tape. Spray paint a few light coats, letting them dry between each coat.
For a better result you can apply a brush to your paint or use a spray gun. Make sure you apply a degreaser prior to using it, as oil or grease will make it more difficult for the paint to stick.
 Reassemble the frame after the paint has dried. Incorporate finishing nails If the corners are sloppy. Be careful not to nail them too closely or the wood may crack. You can also strengthen corners with corner braces. They are L shape pieces that fit in each corner of the frame and echo the angle of the wood. Brass pieces are superior to steel, since they won't cause rust or discoloration to the frame.
Repainting a Wood Sash
Painting a window hinge repairs near me is an essential component of restoring wooden sash windows. It shields the restoration work done on the sash from the sun, weather dirt and insects. Paint also helps keep the putty that is used to make the glazing last from deteriorating. Paint shields the wood and glazing from moisture, which could cause mildew, mold or black spots.
To paint a sash take out any ironmongery, such as handles or locks. This is because it is difficult to paint around these fittings, and then have to be concerned about painting them over. It is best to remove these items prior to painting the frame. After removing all hardware, prepare the sash for painting by scraping off any paint that has escaped. Then, sand the surface to smooth it out. The sash should then be primed prior to painting.
It's advised to use a high quality oil-based primer and let it dry for at least 24 hours prior to starting on the final coat of paint. The primer will help to ensure a uniform finish and make it easier for you to eliminate any discolorations. Once the primer is dry and dry, it's time to begin painting! Make sure you wear a respirator with any oil-based paints as they can release dangerous fumes.
Start by painting the architrave and then the rest of your window frame. Don't forget to paint the cill. After that paint the bottom of the sash, leaving a gap for the top sash to push in. Paint the top sash. Don't paint more than 1mm-2mm from the edges of glass.
Once the sashes are painted, it's time to go to the main mullions. You can paint the main mullions while the sashes are in place, or if you've got enough space and patience, you can paint them when they're taken off. Don't apply too much paint or the windows may jam and make it difficult to open and shut.
Repainting Wood Sills
Window sills are subject to much damage from water, dirt and plants. Paint them with a durable paint that is easy to clean. The use of an exterior gloss paint assists in letting water run off and adhere to the surface.
The majority of older homes have wood sill plates. The wood may be damaged due to water infiltration into un-sealed areas, growth of mold and pest infestation. Wood sills can also decay if they are regularly exposed to moisture. A damaged wood sill plate can cause structural damage to a building and cause sagging floors above it.
The homeowner is able to paint the wooden window sill. The old paint needs to be scraped and sanded to the wood's surface or masonry if needed. Masking tape is a great way to cover up edges you don't want to paint. This is particularly useful in the case of working outdoors. If you need to sand, begin with a coarse sandpaper, and work your way up to an even finer grade. A good quality sandpaper -180-220 grit is ideal -will provide a smooth base for the new coat of paint.
If your home was built before 1978, or the windows were painted prior to the date the sills could contain lead. In this case the paint that was used need to be stripped with chemical strippers or a sander prior to repainting. The majority of newer homes have uPVC sills that can be painted in either high gloss or satin finish. They can be painted to match the color of the front door for a uniform look to the home.
Plastic window sills look worn and are susceptible to rusting when placed in flower pots. It is vital to maintain them in good condition by removing any rust spots and painting them with proper paint. This can be achieved by sanding and priming with MissPompadour To Bond & Block (for aluminium) or MissPompadour Plastic Primer Stainblock. Once the primer has dried for a couple of hours, apply 2 or 3 coats of your chosen colour.
wooden windows repairs near me windows can be an attractive design element in a variety of homes. If properly maintained they are energy efficient and can add character.
They repair wooden window sashes, muntins and frames for sash windows that have been damaged due to weathering. They can tackle paint, rot consolidation and sill repair.
The restoration of wooden windows is vital to maintain the historical integrity of a house. If you have damaged windows that are old and worn out it is recommended to employ an professional.
Repairing a Rotten Wood Frame
It is a risk when the window repair service near me frames made of wood in a house begin to decay. If left untreated, rotting wood can be caused by a fungus that eats the material. In addition to making the area around your windows appear shabby, rotting wood can cause structural problems and can increase humidity in the house.
If the rotting is restricted to a tiny area, it may be possible to save the frame applying an adobe patch. Most often, this involves cutting off the damaged area and then putting in a new piece of timber with similar measurements. It is essential to select wood with a similar moisture content to the timber that was originally used in the frame. If you are unable to find the same type of timber with the exact moisture content, choose one that has the same density and grain pattern.
The next step in the process is mixing the epoxy before you apply it to the patched area. This is best done on a surface that the epoxy will not stick like a sheet of plexiglass. It's also essential to work carefully and take your time so you don't miss any spots. If you're not careful, a small hole could quickly turn into an extensive crack.
After the patch has dried and dried, you can sand the surface and paint it using exterior grade paint. You can also add colors to the patch if you wish.
The wood around windows, and especially the sill, is a frequent location for decay. It is essential to address the issue immediately if there is a problem. The rot can cause other issues with mold within your home.
If you've noticed lots of rot in the frames of your windows It's time to think about replacing them with vinyl windows. Vinyl windows offer many benefits such as improved indoor air quality and energy efficiency. They can also boost the value of your home's resales.
Repainting Wood Frames
If the glass, backing, and hanging hardware are in good condition painting an old frame can give it a fresh look without having to replace them. It can even be cheaper than purchasing a new frame. However, if the wood is in very poor condition, it could be necessary to replace it.
First, clean the frame thoroughly using a an aqueous cloth to get rid of dust and other debris. Then sand the surface to smooth it. If you're planning to reuse the frame apply an primer or undercoat to prepare the surface for paint. If you're not going to use the frame for another time, you can skip this step.
Apply a topcoat or sealant to the frame after it's dry. This will protect the frame's finish. Then you're ready to hang your work.
A stain for wood can be used to improve the color of a wooden frame. Staining preserves the original color but adds a bit of vibrancy and depth. It also helps hide nicks and chips. If you decide to paint your frame, you can use superfine grit and sand the frame again before applying stain.
If you're using spray paint, Porch Daydreamer suggests covering your work area with newspapers or a drop cloth. If you are able remove the glass and art from the frame to prevent drips and splatters. If not, tape the edges of the glass with painter's tape. Spray paint a few light coats, letting them dry between each coat.For a better result you can apply a brush to your paint or use a spray gun. Make sure you apply a degreaser prior to using it, as oil or grease will make it more difficult for the paint to stick.
Reassemble the frame after the paint has dried. Incorporate finishing nails If the corners are sloppy. Be careful not to nail them too closely or the wood may crack. You can also strengthen corners with corner braces. They are L shape pieces that fit in each corner of the frame and echo the angle of the wood. Brass pieces are superior to steel, since they won't cause rust or discoloration to the frame.Repainting a Wood Sash
Painting a window hinge repairs near me is an essential component of restoring wooden sash windows. It shields the restoration work done on the sash from the sun, weather dirt and insects. Paint also helps keep the putty that is used to make the glazing last from deteriorating. Paint shields the wood and glazing from moisture, which could cause mildew, mold or black spots.
To paint a sash take out any ironmongery, such as handles or locks. This is because it is difficult to paint around these fittings, and then have to be concerned about painting them over. It is best to remove these items prior to painting the frame. After removing all hardware, prepare the sash for painting by scraping off any paint that has escaped. Then, sand the surface to smooth it out. The sash should then be primed prior to painting.
It's advised to use a high quality oil-based primer and let it dry for at least 24 hours prior to starting on the final coat of paint. The primer will help to ensure a uniform finish and make it easier for you to eliminate any discolorations. Once the primer is dry and dry, it's time to begin painting! Make sure you wear a respirator with any oil-based paints as they can release dangerous fumes.
Start by painting the architrave and then the rest of your window frame. Don't forget to paint the cill. After that paint the bottom of the sash, leaving a gap for the top sash to push in. Paint the top sash. Don't paint more than 1mm-2mm from the edges of glass.
Once the sashes are painted, it's time to go to the main mullions. You can paint the main mullions while the sashes are in place, or if you've got enough space and patience, you can paint them when they're taken off. Don't apply too much paint or the windows may jam and make it difficult to open and shut.
Repainting Wood Sills
Window sills are subject to much damage from water, dirt and plants. Paint them with a durable paint that is easy to clean. The use of an exterior gloss paint assists in letting water run off and adhere to the surface.
The majority of older homes have wood sill plates. The wood may be damaged due to water infiltration into un-sealed areas, growth of mold and pest infestation. Wood sills can also decay if they are regularly exposed to moisture. A damaged wood sill plate can cause structural damage to a building and cause sagging floors above it.
The homeowner is able to paint the wooden window sill. The old paint needs to be scraped and sanded to the wood's surface or masonry if needed. Masking tape is a great way to cover up edges you don't want to paint. This is particularly useful in the case of working outdoors. If you need to sand, begin with a coarse sandpaper, and work your way up to an even finer grade. A good quality sandpaper -180-220 grit is ideal -will provide a smooth base for the new coat of paint.
If your home was built before 1978, or the windows were painted prior to the date the sills could contain lead. In this case the paint that was used need to be stripped with chemical strippers or a sander prior to repainting. The majority of newer homes have uPVC sills that can be painted in either high gloss or satin finish. They can be painted to match the color of the front door for a uniform look to the home.
Plastic window sills look worn and are susceptible to rusting when placed in flower pots. It is vital to maintain them in good condition by removing any rust spots and painting them with proper paint. This can be achieved by sanding and priming with MissPompadour To Bond & Block (for aluminium) or MissPompadour Plastic Primer Stainblock. Once the primer has dried for a couple of hours, apply 2 or 3 coats of your chosen colour.
- 이전글Five Killer Quora Answers To Windows & Doors Company 25.02.06
- 다음글5 3 Wheel Mobility Scooter For Adults Myths You Should Avoid 25.02.06
댓글목록
등록된 댓글이 없습니다.